How to repair sprinkler heads depends on what's wrong with them, which is a bit like saying how to fix your car depends on whether it's a flat tire or the engine fell out. The good news: sprinkler heads are closer to the tire end of that spectrum. A clogged nozzle is a five-minute fix with a screwdriver and some vinegar. A cracked body means digging, unscrewing, and replacing. A leaking base means the riser connection is shot and you're looking at 15–30 minutes of work with two wrenches. If you're trying to figure out what a repair like this should cost, that post has the full pricing breakdown.
The problem is that most people skip straight to "I need a new head" without diagnosing what's actually broken. I've been repairing sprinkler heads across Middlesex County since 2000 and the number of heads I've replaced that only needed a $3 nozzle swap is, honestly, embarrassing for the industry. My apprentice thinks I should stop telling people this. I think he likes the overtime.
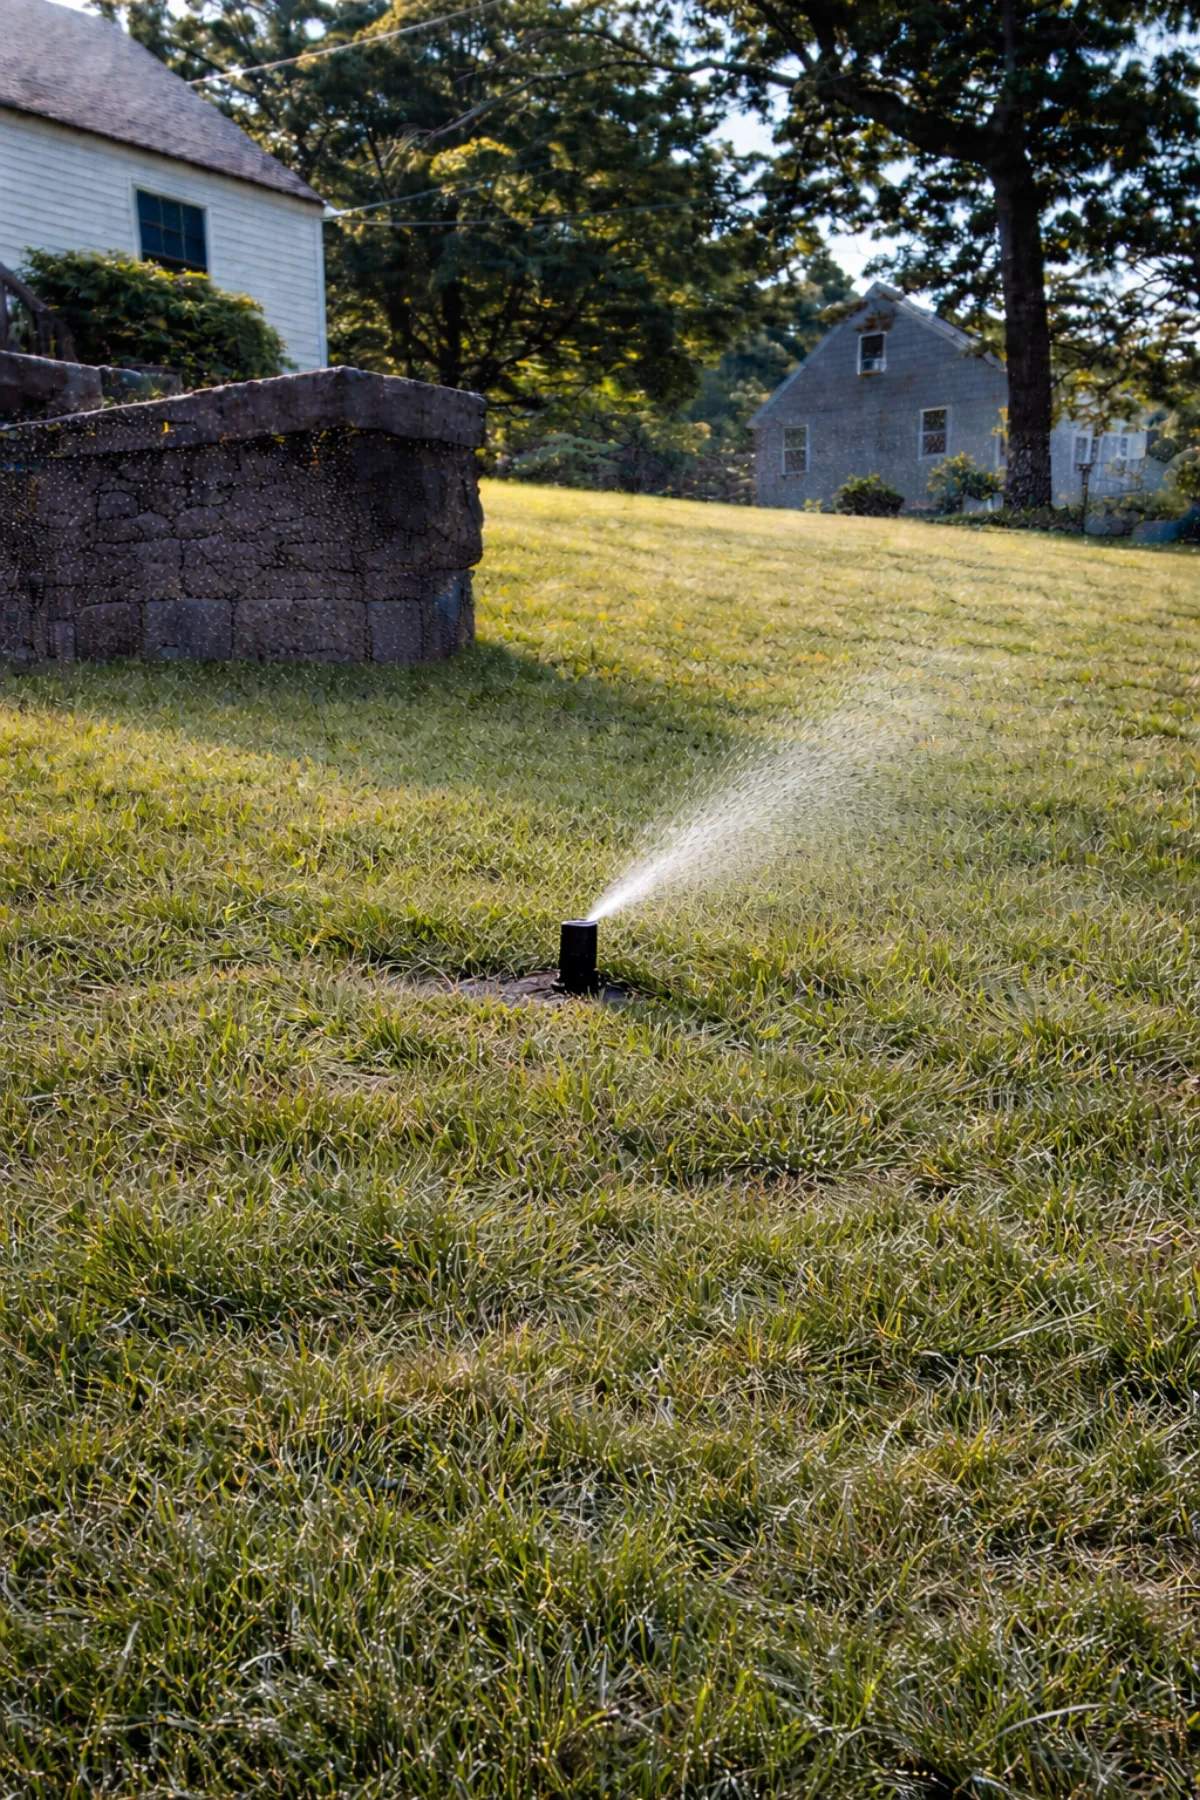
TL;DR
Most sprinkler head repairs fall into three categories: clogged nozzles (clean or replace, $3–$5), sunken or tilted heads (re-level, 10 minutes), and cracked or leaking bodies (full replacement, $75–$150 installed). Before you dig, check the nozzle first. Nine times out of ten, the head is fine and the nozzle is clogged. For a broader look at repair costs across the whole system, see our sprinkler repair cost guide.
If you're also dealing with low pressure across the whole zone, that's a different problem. Fix the pressure first, then check the heads.
The three repairs, ranked by how often we do them
1. Nozzle cleaning or replacement (the one everyone skips)
This is the repair we do most often, and it's the one most people never try.
The nozzle is the small threaded cap on top of the pop-up stem. It controls the spray pattern: the arc, the radius, how much water comes out. When it clogs with debris, mineral buildup, or iron sludge (hello, Tewksbury), the spray pattern goes uneven. One side throws 12 feet, the other side dribbles 4 feet. The head pops up fine. The body is fine. The problem is a $3 part.
How to fix it:
- Turn the zone on from the controller so the head pops up.
- While it's up, unscrew the nozzle counter-clockwise. Most pop-off by hand. If it's stuck, a flat screwdriver under the lip works.
- Turn the zone off. The stem will retract.
- Hold the stem up with one hand (or have someone turn the zone on briefly) and flush water through the body for 10–15 seconds. This clears debris from the filter screen inside.
- Inspect the nozzle. If the orifice is clogged with white or orange buildup, soak it in white vinegar for 20 minutes. Rinse. If the orifice is worn or the plastic is cracked, replace it. $3–$5 at any irrigation supply house.
- Thread the nozzle back on. Adjust the arc and radius with a flat screwdriver (Hunter and Rain Bird both have adjustment screws on top).
- Run the zone and watch the pattern. If it's even, you're done.
Total time: 5 minutes. Total cost: $0–$5. This is the repair that saves people $75–$150 on a head replacement they didn't need.
2. Re-leveling a sunken or tilted head
Massachusetts frost heave pushes heads around. After 5–10 winters, a head that started flush with the lawn sits half an inch low or starts leaning. The spray hits the grass in front of the head instead of arcing over it. You get brown patches. You think the system is broken. The head just needs to be raised.
How to fix it:
- Dig around the head with a hand trowel, 6 inches of clearance on all sides, down to the riser fitting below.
- If the head has sunk, unscrew it from the riser (counter-clockwise, by hand if possible). Add a 1/2-inch or 1-inch threaded riser extension to raise it to grade. These cost $1–$3.
- If the head is tilted but at the right depth, straighten it and pack soil firmly around the base. Use your hands, not your boot. Packing too tight compacts the soil and the head won't drain properly.
- Run the zone. Check that the head sits flush with the lawn surface and the spray clears the surrounding grass.
Total time: 10–15 minutes. Total cost: $1–$3 for a riser extension if needed.
In Chelmsford, where the soil alternates between clay and sand within a mile, we see heads that need re-leveling every 3–4 years. In Tewksbury's sandy glacial outwash, it's every 5–7 years. The soil determines the schedule, not the head.
3. Full head replacement (when the body is actually broken)
If the body is cracked, the seal at the base is leaking, or the internal mechanism is worn (the spring won't push the stem up, or the rotor won't turn), you need a full replacement. This is the $75–$150 repair when we do it. Here's how it works:
What you need: A replacement head that matches the type (pop-up spray or gear-driven rotor), a shovel, two wrenches, and about 20–30 minutes.
How to fix it:
- Turn the zone on briefly to pop the head up, then turn it off. Mark the head location with a flag or a stick.
- Dig around the head, a circle about 10 inches wide, down to the riser or swing joint below. Go slow. The lateral pipe is 6–8 inches down and PVC doesn't forgive a shovel strike.
- Hold the riser fitting with one wrench. Turn the head counter-clockwise with the other. If it's been in clay soil for 8 years, it might take some persuasion. If it doesn't move with moderate pressure, stop. Forcing it cracks the riser, and now you're looking at a $150–$350 pipe repair on top of the head.
- Once the old head is off, check the riser threads. If they're damaged or corroded, replace the riser too, $2–$5 part.
- Wrap the new head's threads with 3–4 wraps of Teflon tape (clockwise, so it doesn't bunch when you thread it on).
- Hand-tighten the new head onto the riser. Then snug it with a wrench, hand-tight plus a quarter turn. Don't over-torque.
- Adjust the nozzle arc and radius to match the zone's coverage pattern.
- Backfill with the soil you dug out. Pack gently. Run the zone and check for leaks at the base and even spray pattern.
The wrench rule: One wrench holds the riser. One wrench turns the head. If you only use one wrench, the torque goes into the pipe below and you'll crack it. This is the most common DIY mistake we see. It's the irrigation equivalent of holding a nail with your fingers while swinging the hammer, technically possible, but the outcome is predictable.
When to stop and call someone
I've talked dozens of homeowners through head repairs over the phone. I've also told dozens more to put the wrench down. Here's the line:
Stop if the old head won't unscrew with moderate force. Corroded or clay-seized threads need a professional with the right tools. Forcing it cracks the lateral line.
Stop if you see water leaking from below the head (not from the nozzle, from the ground). That's a cracked lateral pipe, $150–$350 repair. Not a head problem.
Stop if the wiring to the head is damaged. If the head works manually but won't activate from the controller, it's a wiring fault, $100–$300 to locate and splice. Different skill set.
Stop if you've already tried once and made it worse. No judgment. I've been doing this 25 years and I still have days where a simple swap turns into a three-hour ordeal. Some heads just don't want to come out.
The Tewksbury iron problem (and why your heads clog faster than your neighbor's)
If you're in Tewksbury, especially the Heath Brook area, your town water carries enough iron to stain your driveway orange and clog sprinkler nozzles within a single season. The iron builds up inside the nozzle orifice. A head throwing a 12-foot radius in May barely reaches 6 feet by August. Same hardware, same pressure. Just sludge.
A $15–$25 stainless mesh inline filter installed at the backflow preventer cuts that maintenance load by about 70%. We install them on every Tewksbury system as standard. Without it, you're cleaning nozzles every 6–8 weeks during the season.
If your heads are clogging with orange or brown buildup and you're not in Tewksbury, check your town water quality report. Parts of Billerica and Dracut have elevated iron too. It's not a head problem — it's a water problem. Fix the water, and the heads last years instead of months.
When you probably don't need us
Here's the part where I talk you out of a service call.
If the head pops up but sprays unevenly, try the nozzle fix first. Vinegar soak, 20 minutes, $0. If that doesn't work, replace the nozzle, $3–$5. Don't pay someone $75 to do this.
If the head is tilted but the body works fine, dig around it, straighten it, pack the soil. Ten minutes. A hand trowel and some patience.
If one zone doesn't run at all, the problem is probably the valve or the controller, not the head. Walk through the zone troubleshooting before assuming you need head repairs.
If the system runs through a thunderstorm, check your rain sensor before calling anyone. Massachusetts has required rain sensors on new installs since 2009. The ones from that era are mostly dead, clogged, or defeated by now. A $35 sensor replacement fixes what looks like a "broken system" running in the rain.
We've made the drive to a "broken zone" that turned out to be a chipmunk gnawing through a single wire about six inches off the valve box. We've made the drive to a "controller failure" that turned out to be the backup 9V battery in the garage, dead, $4 part. Honest answer: try the obvious thing first. About a third of our "the system is broken" calls dissolve in 10 minutes with no truck involved.
The honest pricing band
| Repair | EMI Price | DIY Parts Cost |
|---|---|---|
| Nozzle cleaning (vinegar soak) | $45–$75 | $0 |
| Nozzle replacement only | $45–$75 | $3–$5 |
| Pop-up spray head, full replacement | $75–$100 | $5–$12 |
| Gear-driven rotor, full replacement | $100–$150 | $15–$40 |
| Sunken head raise / re-level | $75–$120 | $1–$3 |
| Lateral pipe repair under head | $150–$350 | $30–$60 (if you know what you're doing) |
| Full system diagnostic | $95 (credited toward repair) | — |
We don't do "starting at $49" with a surprise invoice. The price we quote on the phone is the price on the bill.
Straight answers
Q: Can I repair a sprinkler head without replacing it?
A: Yes, if the body is intact. Clogged nozzles, tilted heads, and worn filters are all repairable without replacing the whole head. The nozzle is the most common fix. Unscrew it, soak in vinegar, rinse, replace. $3–$5 part. Try that before you buy a new head.
Q: How do I know if my sprinkler head is broken or just clogged?
A: Turn the zone on and watch. If the head pops up but the spray is weak or uneven, it's probably a clogged nozzle. (We covered this in detail in our sprinkler not popping up guide, but the short version: check the nozzle first.) If the head doesn't pop up at all, it could be low pressure, a stuck stem, or a wiring issue, not necessarily a broken head. If the head pops up but water gushes from the base, the seal or body is cracked and the head needs replacing.
Q: What tools do I need to repair a sprinkler head?
A: For nozzle cleaning: a flat screwdriver and white vinegar. For head replacement: a hand trowel, two wrenches (one to hold the riser, one to turn the head), and Teflon tape. For re-leveling: a hand trowel and a riser extension ($1–$3). That's it. No specialty tools.
Q: How long does a sprinkler head repair take?
A: Nozzle cleaning: 5 minutes. Re-leveling: 10–15 minutes. Full head replacement: 20–30 minutes if the old head cooperates. If the threads are seized or the soil is clay, add another 15–30 minutes of careful work.
Q: Why do my sprinkler heads keep breaking?
A: In Middlesex County, the three most common causes are mower damage (riding mowers catch heads that sit slightly below grade), frost heave (Massachusetts zone 6a gets 40+ freeze-thaw cycles per winter, and each cycle shifts the head slightly), and iron/mineral buildup (especially in Tewksbury and parts of Billerica). If heads are failing every 2–3 years, the issue is probably installation depth or soil movement, not the heads themselves.
Q: Should I repair or replace my sprinkler head?
A: If the body is cracked, the seal is leaking at the base, or the internal mechanism is worn (spring won't push the stem up, rotor won't turn), replace it. If the body is intact and the problem is a clogged nozzle, a tilted head, or a sunken head, repair it. We check the nozzle first before recommending a full replacement. Some companies skip that step.
Q: Can I mix different brands of sprinkler heads?
A: Pop-up spray heads are mostly cross-compatible. Hunter, Rain Bird, and Toro all use standard thread sizes. Gear-driven rotors are trickier. Mixing brands in the same zone can cause uneven precipitation rates (one head throws more water than its neighbor), which leads to dry spots and wet spots. Match the brand on rotors. Spray heads are more forgiving.
A sprinkler head repair is one of those jobs where the diagnosis matters more than the wrench work. The wrong fix costs you twice — once for the repair, once for the repair of the repair. (I've seen that chain go three deep. The homeowner's wallet and I are still in therapy.)
We're at 781-983-3739, Monday through Friday 7 AM to 6 PM, Saturday 8 AM to 2 PM. If it's a nozzle swap, I'll tell you on the phone and save you the trip. If it needs a truck, we'll quote the real number before we dig. And if you've already tried to fix it yourself and made it worse — join the club. The membership is free and the stories are excellent.
— Nick, EMI Irrigation
Ready to get your system handled?
EMI Irrigation — family-owned, serving the greater Billerica area and Southern NH.